This weekend, I finally came around to enabling IPv6 on my web server. In this post, I describe what I did to get everything up and running on a netcup vServer running CentOS 8, but this should be quite the same for other web hoster services.
Motivation
My ISP (like many others) primarily uses IPv6 for client IPs and offers IPv4 access via DS-Lite . On random occasions, the IPv4 gateway (DS-Lite NAT) isn’t available, and I can only access the part of the internet which is correctly configured for IPv6 traffic. I was pretty surprised - and frankly shocked - how much this cripples my internet access. Of everything I’ve tried until now, only a handful of services are accessible through IPv6: Google, YouTube, and a couple of IT expert blogs like mkammerer.de ;
Considering how long we know about IPv4 address shortage and that IPv6 is far from the new kid on the block, this struck me as odd - until I remembered how my own vServer was still locked in the IPv4 universe.
So, how hard can it be?
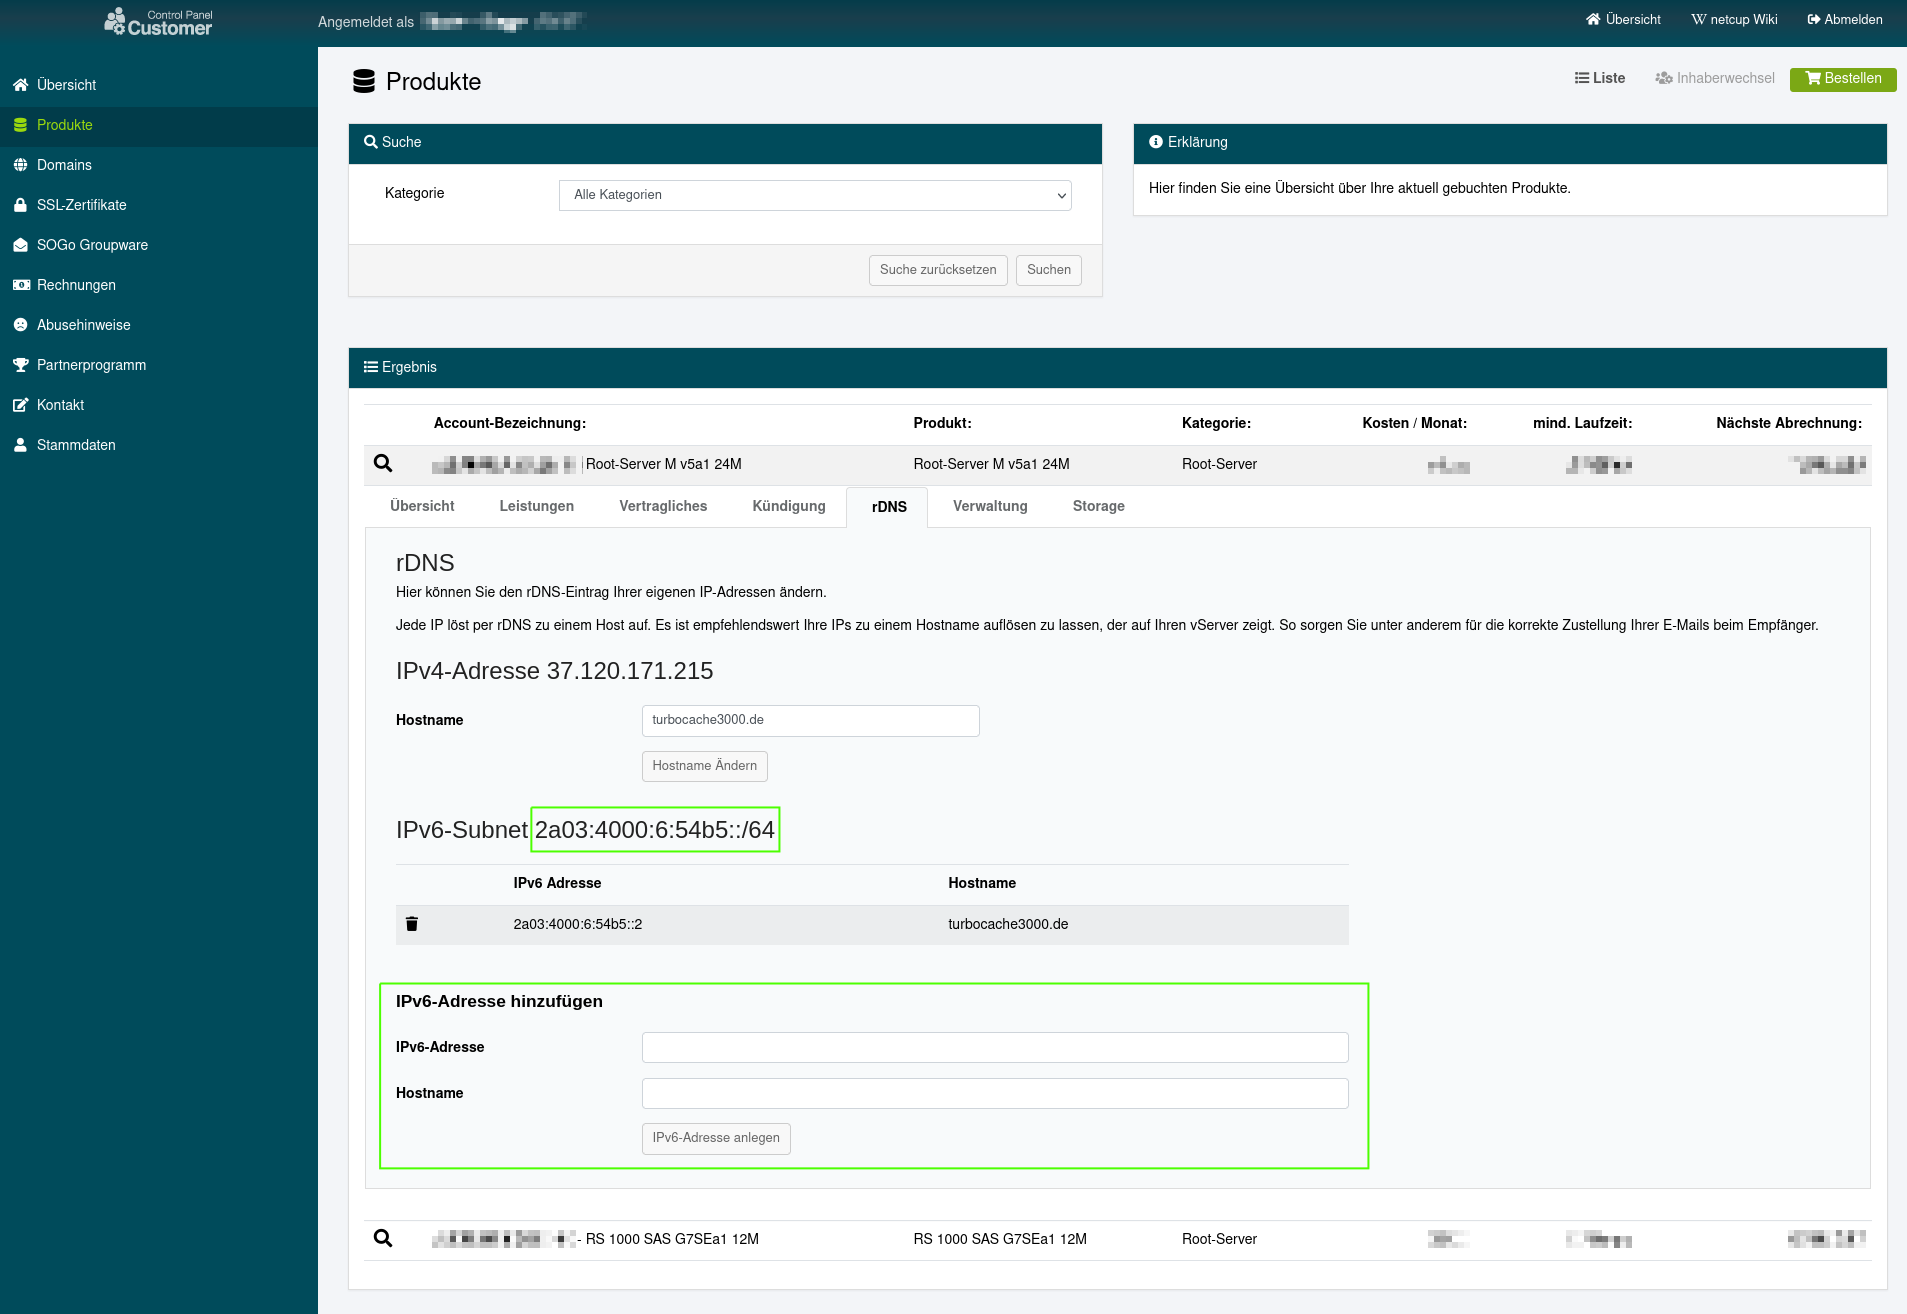
Step 1: Getting an IPv6 Address and rDNS
The first thing we need to do is getting the actual external IPv6 address for our machine. While you’ll probably get just one IPv4 address for your server, a whole IPv6 subnet is usually assigned to your machine.
A subnet looks like this 2a03:4000:6:12ab::/64. This means that you can assign any address between 2a03:4000:6:12ab::0 and 2a03:4000:6:12ab:ffff:ffff:ffff:ffff to your machine.
Select any IP in this range and add it for reverse DNS (rDNS) lookup to your machine. This means that anyone asking the DNS to a domain name for your IPv6 address will get back your domain name.
Step 2: Assigning Your IPv6 Address to Your Machine
Next, we set up a static IPv6 address. CentOS 8 has IPv6 enabled by default, so you don’t have to do anything there unless you have explicitly disabled IPv6 before.
Check this by executing ip -6 a on your server. You should at least see a loopback interface
and a link-local
address like that:
1: lo: <LOOPBACK,UP,LOWER_UP> mtu 65536 state UNKNOWN qlen 1000
    inet6 ::1/128 scope host
       valid_lft forever preferred_lft forever
2: eth0: <BROADCAST,MULTICAST,UP,LOWER_UP> mtu 1500 state UP qlen 1000
    inet6 fe80::5232:c368:a075:55a5/64 scope link noprefixroute
       valid_lft forever preferred_lft forever
If you don’t see either of those, check out this guide on tecmint .
From there on out, configuring a static IPv6 address is smooth sailing! Just add the following lines to /etc/sysconfig/network-scripts/ifcfg-eth0. Remember that eth0 is your interface name and might be called something else in your case, e.g. enp6s0. You can see the actual interface name in the output of the ip command above.
IPV6INIT=yes
IPV6ADDR=2a03:4000:6:12ab::1/64
IPV6_DEFAULTGW=fe80::1
IPV6_DEFAULTDEV=eth0
Replace 2a03:4000:6:12ab::1 with the IPv6 address you configured for rDNS and eth0 with your actual network interface.
If you configured IPv4 to use DHCP, please undo that now. IPv4 and IPv6 should both be static, or the DHCP client might override your static IPv6 configuration. In my case, there was nothing to do. If you can see the line BOOTPROTO=none in your /etc/sysconfig/network-scripts/ifcfg-eth0 you’re golden. Otherwise, check this guide on computingforgeeks.com
.
After you’re done with that, reboot your system using sudo reboot. Just reloading the NetworkManager service did absolutely nothing in my case. If you find a solution that doesn’t involve a complete reboot, I’d be happy to hear from you and update this section.
After the reboot, ip -6 a should look something like that:
1: lo: <LOOPBACK,UP,LOWER_UP> mtu 65536 state UNKNOWN qlen 1000
    inet6 ::1/128 scope host
       valid_lft forever preferred_lft forever
2: eth0: <BROADCAST,MULTICAST,UP,LOWER_UP> mtu 1500 state UP qlen 1000
    inet6 2a03:4000:6:12ab::1/64 scope global noprefixroute
       valid_lft forever preferred_lft forever
    inet6 fe80::5232:c368:a075:55a5/64 scope link noprefixroute
       valid_lft forever preferred_lft forever
Step 3: Adding IPv6 DNS Entries
Now we can add the DNS entries for your shiny new IPv6 address.
The easiest way is to add an additional AAAA entry with your IPv6 address for every existing A entry with your IPv4 address.
In my case, these would look like that:
| Host | Type | Destination |
|---|---|---|
| * | AAAA | 2a03:4000:6:12ab::1 |
| @ | AAAA | 2a03:4000:6:12ab::1 |
Keep in mind that changed DNS entries might take a while until they’re known to all DNS servers.
Check your DNS TTL before starting to panic. For example, my .eu domain took about half an hour, while my .dev domain accepted the change right away. In some cases, this might take up to 48 hours.
Also, flush your local DNS cache or check using another device if it takes longer than expected. I had those caches fool me a couple of times before.
Step 3: Configuring IPv6 in Your Web Server
It’s time to make sure that your web server is listening to IPv6 requests.
I’m using nginx, so in my case, that meant adding listen [::]:80; to every http server block and listen [::]:443 ssl http2; to every HTTPS server block.
You should easily find all relevant places in your configuration by searching for the corresponding IPv4 instructions (listen 80; and listen 443 ssl http2;). Depending on your SSL configuration, the HTTPS argument might be looking slightly different.
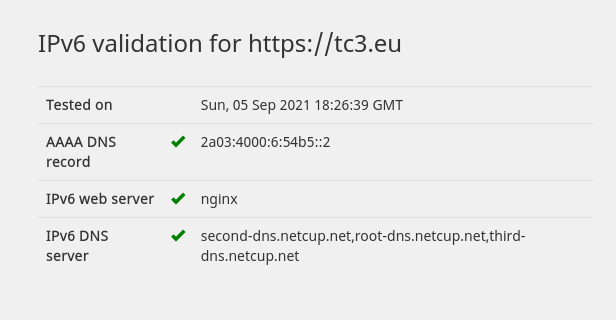
Step 4: Testing
The last step is to test if we did everything right. You can use ping6 yourdomain.com to check if your machine answers to IPv6 pings and ipv6-test.com
to check if your website is served via IPv6.
Conclusion
And that’s it. It shouldn’t take you more than half an hour to make the internet a better place. The future is now 🚀!